Luffy /2/ 后台数据库配置&前台创建配置
目录
二次封装Response
utils/reponse.py
from rest_framework.response import Response class APIReponse(Response): # 将父类的status重名http_status def __init__(self, status=100, msg='成功', http_status=None, template_name=None, headers=None, exception=False, content_type=None, **kwargs): data = { 'status': status, 'msg': msg } if kwargs: # kwags接收除了处初始化规定的参数以外的参数,也用于更新字典 data.update(kwargs) super.__init__(data=data, status=http_status, template_name=template_name, headers=headers, exception=exception, content_type=content_type) 后台数据库配置
命令操作
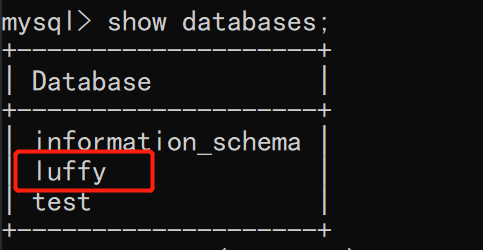
# 创建数据库 create database luffy default charset=utf8; # 创建用户并授权 ## 查看用户 ### 5.7之前版本 select user,host,password from mysql.user; ### 5.7往后的版本 select user,host,authentication_string from mysql.user; ## 创建用户 ### 授权账号命令:grant 权限(create, update) on 库.表 to '账号'@'host' identified by '密码' ## 这里授权所有权限 grant all privileges on luffy.* to 'luffy'@'%' identified by '7410'; grant all privileges on luffy.* to 'luffy'@'localhost' identified by '7410'; ## 刷新权限表 flush privileges; pycharm连接
## 项目配置文件加入 'default': { 'ENGINE': 'django.db.backends.mysql', 'NAME': 'luffy', # 数据库名字 'USER': 'luffy', # 用户名 'PASSWORD': '7410', 'HOST': '7410', 'PORT': 3306 } 然后再登录查看数据库只能查看luffy库
django操作mysql
方式一
模式使用MysqlDB来操作,MysqlDB在python3.x以后不存在了
方式二
使用pymysql替换,django2.0.7版本及以上,如果使用pymysql替换,需要改django源码
import pymysql pymysql.install_as_MySQLdb() 不改报错:AttributeError: 'str' object has no attribute 'decode'

query = query.decode(errors='replace') # 改成 query = query.encode(errors='replace') 所以不推荐改源码这种形式
推荐使用mysqlclient模块,其实就是MysqlDB在python3.x以后使用的版本,只不过变成了mysqlclient,使用mysqlclient不需要写两句话,不用改源码
如果装mysqlclient报以下错,可参考:
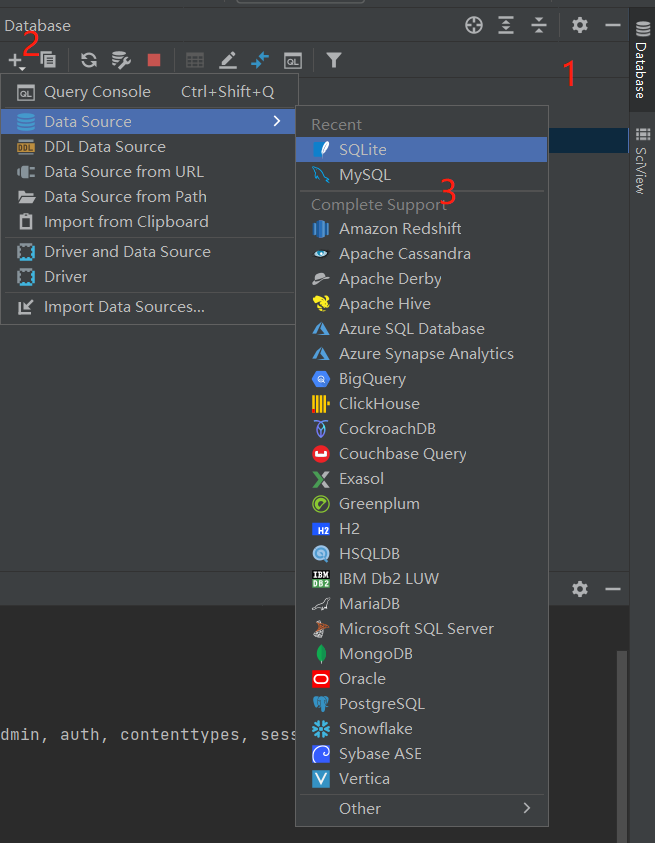
下载成功可以使用pycharm连接一下
user表设计
这里基于auth的user表扩写,千万要注意,扩写好之前不要先迁移数据库,如果迁移了就不行了
如果你已经迁移了,删除数据库,删除所有的migrations文件,包含你自己的app,和auth和admin这两个app
# 用户板块---》做成app python ../../manage.py startapp user # models.py from django.db import models from django.contrib.auth.models import AbstractUser class User(AbstractUser): mobile = models.CharField(max_length=11, unique=True) # 唯一,长度11 # 需要pillow包的支持 ImageField继承自FileField icon = models.ImageField(upload_to='icon', default='icon/default.png') class Meta: db_table = 'luffy_user' verbose_name = '用户表' verbose_name_plural = verbose_name def __str__(self): return self.username setting/dev.py
# 配置文件---》注册表 INSTALLED_APPS = [ 'user', ] # 自定义User表 AUTH_USER_MODEL = 'user.User' ## 配置media MEDIA_URL = '/media/' MEDIA_ROOT = os.path.join(BASE_DIR, 'media') 安装pillow模块
# 安装pillow pip install pillow ''' Pillow是PIL的一个派生分支,但如今已经发展成为比PIL本身更具活力的图像处理库。pillow可以说已经取代了PIL,将其封装成python的库(pip即可安装),且支持python2和python3,目前最新版本是3.0.0 ''' 迁移
python manage.py makemigrations python manage.py migrate 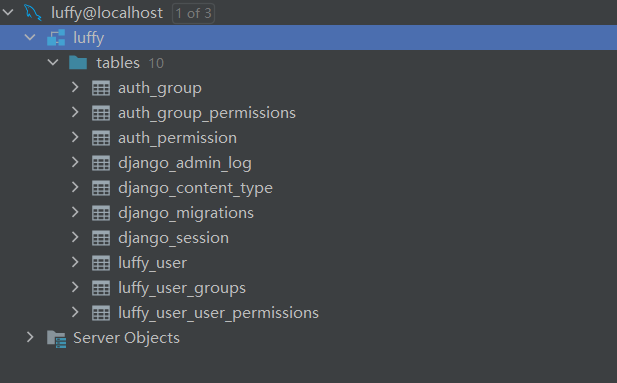
前台创建及配置
我的是win平台,建议使用管理员打开cmd创建
# 创建项目 vue create luffycity 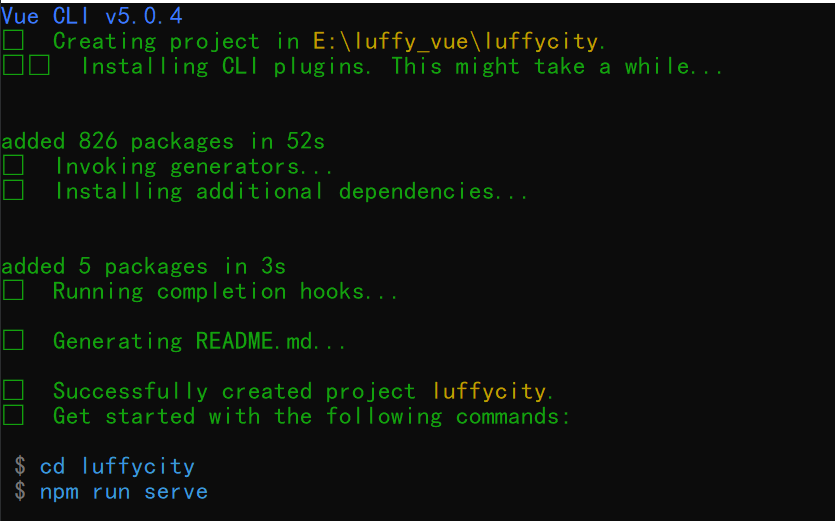
使用pycharm打开配置
-
删除
components/HelloWorld.vue,views/AboutView.vue -
views/HomeView.vue
<template> <div class=home> <h1>首页</h1> </div> </template> <script> export default { name: 'HomeView', components: { } } </script> router/index.js
const routes = [ { path: '/', name: 'home', component: HomeView }, ] // index.js种routes里删除下面的内容 { path: '/about', name: 'about', // route level code-splitting // this generates a separate chunk (about.[hash].js) for this route // which is lazy-loaded when the route is visited. component: () => import(/* webpackChunkName: about */ '../views/AboutView.vue') } APP.vue
<template> <div id=app> <router-view/> </div> </template> -
集成elementui 、bootstrap、jquery、axios
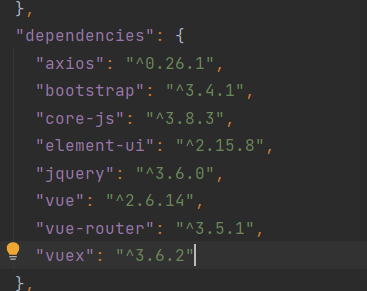
// elementui ,bootstrap,jquery,axios配置 // axios npm install axios -S // main.js import axios from 'axios' Vue.prototype.$axios = axios; //elementui npm install element-ui -S // main.js import ElementUI from 'element-ui'; import 'element-ui/lib/theme-chalk/index.css'; Vue.use(ElementUI); // bootstrap和jq npm install jquery -S npm install bootstrap@3 -S // vue.config.js const {defineConfig} = require('@vue/cli-service') const webpack = require(webpack); module.exports = defineConfig({ transpileDependencies: true, configureWebpack: { plugins: [ new webpack.ProvidePlugin({ $: jquery, jQuery: jquery, window.jQuery: jquery, window.$: jquery, Popper: [popper.js, default] }) ] }, }) // main.js,导入 import 'bootstrap' import 'bootstrap/dist/css/bootstrap.min.css'
全局css样式配置
assets/css/global.css
/* 声明全局样式和项目的初始化样式 */ body, h1, h2, h3, h4, h5, h6, p, table, tr, td, ul, li, a, form, input, select, option, textarea { margin: 0; padding: 0; font-size: 15px; } a { text-decoration: none; color: #333; } ul { list-style: none; } table { border-collapse: collapse; /* 合并边框 */ } main.js
// 把自己定义的global.css 引入 import './assets/css/global.css' 配置文件配置
assets/js/settings.js
export default { base_url: http://127.0.0.1:8000 } main.js
// 导入自定义配置 import settings from './assets/js/settings' Vue.prototype.$settings = settings;